
June 15, 2017
9. WiFi Remote Control
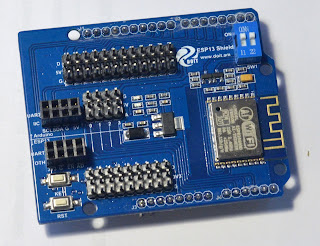
Finally, we found some time to play with the ESP13 board. After a deeper investigation - this module proved to be a very self-sustaining and robust shield which grants the limitless access to the WiFi connection for any Arduino projects.

June 10, 2017
8. Software Architecture and Multitasking
In the previous posts, you might notice that as the code of the robot was growing, we started grouping related pieces into separate files and tried to make these pieces as independent as possible.
Now it is time to give some explanations, why that was done, and how can we ensure timely reaction to the outside events, having that many things to do on such a simplistic board as Arduino UNO/MEGA.
Now it is time to give some explanations, why that was done, and how can we ensure timely reaction to the outside events, having that many things to do on such a simplistic board as Arduino UNO/MEGA.
June 4, 2017
7. Sounds Generation
Our robot learned how to crawl. Now it is time to give it a voice. It is obvious that even well-known R2D2 became famous also because of his magnificent trills and beeps. Our robot cannot miss this part.
There are lots of inexpensive sound generation modules which can be integrated with Arduino. Including even modules which can play MP3 files from the built-in micro-SD card.
Currently, we have nothing like that. But still, there is a way do beep.
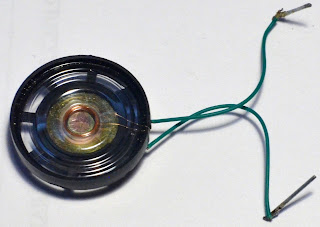
From the old broken toy we extracted a beeper - I believe in any house with kids you can find a couple.
There are lots of inexpensive sound generation modules which can be integrated with Arduino. Including even modules which can play MP3 files from the built-in micro-SD card.
Currently, we have nothing like that. But still, there is a way do beep.
From the old broken toy we extracted a beeper - I believe in any house with kids you can find a couple.

June 2, 2017
6. Power for the Robot
The fіrst prototype
While working with the introductory Arduino experiments, it is unlikely you face any concerns on how to power your circuits. Usually, your board receives all it need through the USB connection from the computer. For the sophisticated experiments you can even buy a breadboard with the power supply module (like this one).

Talking about the autonomous robot - it starts to be a bit more complicated. You can't rely on external power, and you need to find the way to have everything on board.
May 20, 2017
5. Operating the Electric Motors
Transistor-based DC Motor Control
The best way to work with the DC motors is to use a specialized Motor Shield.
At first - we did not have it. But still, we were desperately eager to try our new chassis in action.
We were lucky - while building our starting kit, we took a couple of NPN transistors 2N2222A. Here and here we found a nice and short explanation how to use a transistor to control high currents of the DC motors without the risk to damage the Arduino board.

May 14, 2017
4. Arduino MEGA 2560
WHY?
The grandiosity of the plans we have for our mighty robot raised some concerns. Can a single Arduino UNO carry on all the tasks we expect? At that time we did not trust much the wires-saving technologies like I2C or SPI. So we thought, first of all, we will quickly run out of available Arduino ports.
May 11, 2017
3. Chassis Selection
The Plan
Preparation steps may take a lot of time. I and my son spent more than two months learning the basics and running small experiments with Arduino. We used a custom-built starting kit, passed a couple of beginners ramp-up courses, played with Arduino board, sensors, LED and electric motors driven by transistors. Ultimately, we figured out what can we expect from the Arduino-based robot, and what kind of the tasks it can perform.
We decided to build a rather big robot which should be able to wander around the rooms. It needs to be capable going over 5 cm (2 inches) doorsteps (because that is the height of the doorsteps in our house. Also, the robot must be stable and capable of wearing lots of sensors, a video camera or a cell phone, and/or some small TFT screen. Imagination instantly paints some caterpillar-chassis robot 10 cm high and 20x20 cm long and wide (~4x8x8 inches).
Subscribe to:
Posts (Atom)