December 9, 2018

14. Radio-controlled Robot

The new challenges


We consider our tank-robot project as a very successful one - our creature can be nicely controlled remotely over Wi-Fi, or navigate around in the autonomous mode avoiding dangers and collisions. Still, there are questions which we could not answer:
  • Remote control over the Wi-Fi lags even if you connect your agents directly. Is there any better way to control the robot? Can the Radio Controlling system be the answer?
  • Do you really need to purchase expensive factory-made chassis, or there is some better way?
  • Could LCD displays be useful for a small robot?
  • Is it hard to use Li-Ion battery in the project?
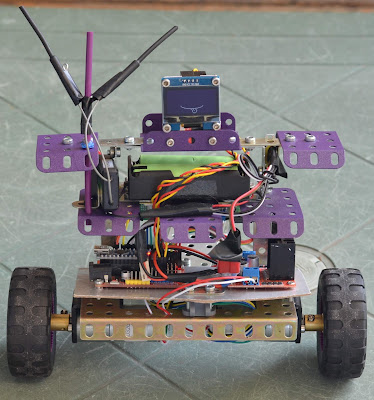
To answer these questions - we decided to build a new robot, which will be a lightweight peer for our tank.

Radio-Controlled Robot


December 18, 2017

13. Lighting up the Robot

A major part of the modern electronic devices glamour comes from the calm inhuman glow of the LED's carefully embedded into their bodies.

Our robot is not an exception. Adding just couple simple LEDs, changed its appearance radically. Let's see what resources the robotics designers can tap into, and bring more light into their projects.

Robot with the lights - in a blaze of glory

August 30, 2017

12. Better Remote Control with FPV

Making Things Complicated

In one of the previous posts, we explained the initial version of the remote control system, implemented for our robot. It was based on a simple protocol and used RoboRemo application as a remote control user interface.

The simplicity of the solution posed some limits on the functions. At some point, we decided to make a step forward and implement a more complicated remote control version.

Mainly - we were looking for:
  • FPV (First Person View) - the possibility to see the real-time video from the camera installed at the robot
  • Usage of joystick or steering wheel to control the robot
  • Having a big dashboard with many small controls which can operate numerous features of the robot and indicate on the screen the real status which is based on telemetry
  • Possibility to see all the traffic between the robot and the remote control application, having the possibility to type commands manually
We could not find anything ready to use, so we decided to build own application from scratch.

August 1, 2017

11. Infrared Distance Sensors

How it works

Facing the insufficiency of the ultrasonic distance sensors for the autonomous navigation, we arrived at the next stop - infrared distance sensors.

The plan was to build kind of sensors array formed by the numerous distance sensors facing in different directions and saving the robot at least from hitting the obstacles in front and falling down from the height. These sensors must be inexpensive both in terms of money and energy consumption.

Soon we found an interesting option, surprisingly named "Infrared Obstacle Avoidance Sensor for Arduino Robot" - it is precisely what we need!

Infrared Obstacle Avoidance Sensor

July 19, 2017

10. Ultrasonic Distance Sensor

How it works


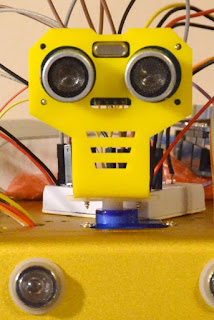
It is time to teach our robot navigating autonomously around the room. Some time ago we installed Ultrasonic Distance Sensor HC-SR04 with the mounting bracket. But up to this point, it was used just as a nice decoration.

Ultrasonic Distance Sensor HC-SR04 with the mounting bracket

June 15, 2017

9. WiFi Remote Control

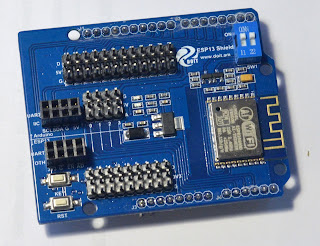
Finally, we found some time to play with the ESP13 board. After a deeper investigation - this module proved to be a very self-sustaining and robust shield which grants the limitless access to the WiFi connection for any Arduino projects.

ESP13 Shield

June 10, 2017

8. Software Architecture and Multitasking

In the previous posts, you might notice that as the code of the robot was growing, we started grouping related pieces into separate files and tried to make these pieces as independent as possible.

Now it is time to give some explanations, why that was done, and how can we ensure timely reaction to the outside events, having that many things to do on such a simplistic board as Arduino UNO/MEGA.